Thursday 16 January 2014

Download - Dhoom 3 Game free for all platforms (Android, iOS, Windows Phone, BB10, Symbian)

Download - Dhoom 3 Game free for all platforms (Android, iOS, Windows Phone, BB10, Symbian)


  • Uday Chopra, Aamir Khan and Abhishek Bachchan in  Dhoom:3 Game Poster

     The adventures of no-nonsense cop Jai Dixit which is abhishek bacchan and his sidekick Ali Akbar continue. The canny, analytical Jai will go to any lengths to catch his adversary. Ali is an entertainer, always ready to fall in love and basically a reluctant cop, but there by Jai's side as they take on a pair of new villains.


  • Initial releaseDecember 19, 2013 (Kuwait)

  • Running time172 minutes


  • click below to see video of Dhoom 3 game...


    After unveiling the Windows Phone version of the ‘Dhoom 3: The Game’ last month, the app is now available on iOS and Android repositories too.

    In the game, you play as the movie's central character (played by Aamir Khan) racing a superbike through the streets of Chicago, evading the cops (played by Abhishek Bachchan and Uday Chopra). The game is available on iOS, Android, Windows Phone 8, and BlackBerry 10 platforms, as well as on Nokia feature phones. The game has seen over a million downloads in just 20 days on Windows Phone platform itself. Currently the game is pegged at around 1.7 million downloads. And now with Aamir and Katrina launching it on other platforms, including iOS and Android, the game is bound get more popular.


    Check out the launch images below; followed 

    by the download links.

    Publisher: 99Games

    Platforms: Android, iOS, Windows Phone, BB10, Symbian

    Size: Varies with device

    Price: Free

    Download URLs: 


  • Download Complete Microsoft .NET Framework 4.5 Setup

    Download Complete Microsoft .NET Framework 4.5 Setup

    Microsoft .NET is a must program for every PC as almost all the new applications in windows wont run without .NET framework.The Microsoft .NET Framework 4.5 is useful for programmers and developers.
    .net+framework
    Previously Microsoft used to provide only online installers which requires Internet connection for installing the whole package.But with the current version of 4.5 they are providing both online installer and offline installer as well.

    .NET is an inbuilt feature in Windows 8:

    If you are using windows 8 then microsoft .net framework is already part of this operating system.All you need to do is to update your windows 8 OS in order to update .NET framework 4.5 installation.
    microsoft+.net+program+is+already+a+part+of+windows+8+operating+system

    There are many problems with online installers like:

    • The installation may hang forever if you have slow internet connection like dial-up, GPRS, etc.
    • You cannot use it if you are not connected to internet.
    • If you are using pirated version of windows then its better to stay away from softwares/installer from Microsoft which connects to Internet.

    Advantages of Offline Installer:

    • No trouble with installation even without internet connection.
    • You can install .NET framework on multiple computers even without internet connection.

    Microsoft .Net Framework 4.5 Requirement:

    • O.S:Windows Vista SP2, Windows 7, Windows Server 2008 R2 SP1 (x64)and Windows Server 2008 SP2 (x86 and x64).
    • Hardware Requirements:512 MB RAM, 850 MB available space for (X86) and 2 GB space for (X64) versions.

    Here I will be providing links for both offline and online installer as well:

    • Online Installer is about 982 KB.
    • Offline installer i.e complete Framework is about 48MB.

    Direct Download Links to Offline Installers:

    Microsoft .NET 4.5 Offline Installer (works for both 32 bit and 64 bit). 
    Microsoft .NET 4.5 Online Installer (for both 32 bit and 64 bit).
    .NET Framework 4.5 language pack – Deutsch
    .NET Framework 4.5 language pack – French
    .NET Framework 4.5 language pack – Italian 
    Note:The above links are authenticated and hosted by Microsoft's Servers. 

    Download WhatsApp for PC/Laptop - Windows/Mac

    Download WhatsApp for PC/Laptop - Windows/Mac

    Are you in search for finding out How to Use WhatsApp on your Computer at your own comfort? In this tutorial we described a step by step tutorial on downloading and installing whatsapp on your PC either it might be Windows or Mac machine.

    If you are a smart phone user then you might have been using it since few months. WhatsApp is an awesome application which helps users to send sms to any other mobile for free of cost.On an average around 1 Billion messages are sent through WhatsApp every day,which is 1/7th of the world population(That means every 7th person is sending a message using Whatsapp).
    whatsapp

    How to Use WhatsApp on PC:

    Using Whatsapp on your PC is pretty much straight forward.All you need is a Android Emulator to sync android apps on your Windows or Mac Operating System.

    Step by Step Guide to Download and Install WhatsApp on your PC:

    bluestacks+for+windows+and+mac
    • Choose the operating system which you are using either it might be Windows or Mac and download the respective version and install the app.
    If you are getting some error like "The application failed to initialized properly (0xc0000135) . Click on ok tp terminate the application",then .NET framework is missing on your PC.

    click here to install latest version of .NET Framework.
    • After installing Bluestacks open the Software and there you see some already installed apps.
    bluestacks+dashboard
    • Click on Search button and search for WhatsApp.
    • Then you will be suggested different places from where you can get Whatsapp App.I prefer Google Play,so just click on Whatsapp Messenger on Google Play column and install the app.
    download+whatsapp
    • After installing the App open it then you have to Choose your Country and Enter Phone number to start using Whatsapp on your PC.

    Sync your mobile apps using Bluestack Cloud connect:

    • Open the BLUESTACKS application and Click on the settings button at the right end.
    bluestacks+cloud+connect
    • Choose the first option "cloud connect".
    • A box opens select "yes" and click on next.
    • Enter your email address , Mobile number and click on "Register".
    • Now you will receive a email with a Pin number.
    • Now take your android mobile and Go to market place and search for "Bluestacks", Download and install the application.
    • Open the application and enter the pin number that you received.
    • That's it now you can Sync any application on your mobile with your PC.
    That's all for now friends.Enjoy using WhatsApp for PC.

    Top 6 Apps To Track Your Lost Android Phone

    Top 6 Apps To Track Your Lost Android Phone

    An Android phone is a treasured technology that helps you to store all you important information, personal or business! All of the smartphones are being used in a very intelligent way, and mostly as a personal device, that stores and manages all your personal data, including the business transactions.Therefore when it comes to managing these devices, you should take extra care while protecting these to avoid loss of critical information. Android phone can be protected with the help of location finder apps, anti-theft apps, that help you to find out the location of your lost/stolen android phone. We have listed top 6 apps that can help you track your lost android phone.
    Lost-Android-Phone

    Below are some Best Android Apps to find your Lost Android Mobile

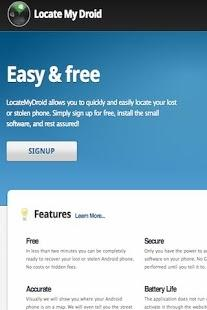
    Locate My Droid

    Lost+my+Droid

    Now this is one app that you should have in your android phone, because if in case your phone is stolen or misplaced, then you can login to see where your phone is. The app lets you to track your android phone in real time, and it works worldwide! One thing to make sure is, after installation of app you should activate it in order to locate your android phone. With this app you can check on your lost phone, trace it, find it via GPS, trigger a noise to find it. This is a best option to locate your android phone.

    Where’s My Droid

    wheres+my+droid

    This app is full of features that help in finding your Android Phone. The extended features make it easy to track down the missing cell phone. It is capable of ringing your cell phone and that too on a high volume. The app is also potent and can pin GPS location points in a Google Map, so even if you’re not near your cell phone to hear it ringing, you can still track it via Google Map. With this app you can make your cell phone vibrate/ring, find it using GPS tracking, protect using passcode, get notified if SIM card is changed, and moreover the app doesn’t suck out all the battery of your Android Phone.

    AntiDroidTheft

    anti+droid+theft

    This app lets you to tighten the security of your phone if it is lost or stolen. You can track the location, trigger the app to take pictures, and see them on their website. The app lets you to view the location of the phone with the help of GPS, notifies you regarding any changes that take place with phone number or SIM, also lets you view the images that get taken from the camera of the cell phone. This app is the oldest and a famous anti-theft application that has been used by android users to ensure the safety of  their device.

    Plan B

    plan+b

    Plan B comes as a lifesaver, especially if you haven’t installed any tracking application on your android device before it got misplaced or stolen.  This is very helpful, as you can install it on your android device and it’ll immediately start sending your android phone’s location to your gmail account. Before you get started with any of this, you need to make sure that you have an access to the android google store, and since you had android phone you must be having a google account as well. What makes Plan B excellent is the fact that it has the ability to switch on the GPS of your android device. Moreover the location of your android device gets updated in every 10mins, and you will receive an email notification every time your cell phone gets located.

    Android Lost 

    android+lost

    This application can turn out to be a nightmare for the thief who stole your Android phone! With this application you can remotely control your android device with the help of SMS or internet. It gives you a wide variety of features that lets you to read all the sent as well as received text messages, lets you wipe and lock the phone, erase the SD card’s data, locate it with the help of GPS network, remotely trigger SMS alarm, sms lock and unlock, start/stop GPS and wi-fi, get notified if the SIM is removed or changed, get call log, take image from the rear and front camera, issue commands with the help of SMS, restore settings, use mic to record sound, check the browser’s content and so on. There’s so much that you can do with the help of this application, and can make your android phone totally useless to its thief!

    Prey Anti Theft

    prey+anti+theft

    Prey Anti Theft is another application especially made to help you deal with the situation when you have lost your android smartphone, laptop or tablet. It works the same if your device has been stolen. You can easily track your device with the help of GPS location, but there are many other features that make this app absolutely wonderful. This app is free to install, and you can use it to safeguard upto 3 android devices with one single account. It lets you find your smartphone with the help of GPS and WiFi, makes it possible for you to get pictures clicked from the smartphone’s rear and front camera, lock your smartphone, trigger an alarm even if your phone is on silent, get information from the network to get details about exact pinpointing! All in all, its another best application to try out if you have lost or misplaced your android device.

    These are the Top 6 applications we believe are best to track down your lost android phone. Of course each app is different and has a different mode of working. Install one of the app in your android phone to ensure safety of the crucial information you’ve been saving, and you won’t have to worry anymore. Try out these apps today !

    Tuesday 14 January 2014

    Homemade Laptop Cooling Pad

    homemade-laptop-cooling-pad
    Overheating is the biggest enemy of a laptop. It can damage its delicate internal components.  There can be many reasons for overheating – dirt in  the cooling system, hardware(fan) failure, improper usage or even bad design of laptop. The solution for many of these problems can be as simple as a cooling pad. A cooling pad comes in two varieties –  active, the one that has a fan and passive, the one without a fan.
    Making a passive cooling pad is very simple. It can be made from materials commonly found in every household. Here are the instructions for homemade laptop cooling pad.

    Prerequisites:

    Before we start we require the following items:
    1. A piece of cardboard larger than your laptop
    2. Black marker or pen
    3. Wide cello tape
    4. Paper cutter or sharp scissors
    5. Metal ruler
    6. Glue
    7. Some paper for covering
    prerequisites-for-cooling-pad

    Skills Level:

    Beginner. Basic knowledge of cutting and folding.

    Instructions:

    Now we have everything ready, lets begin making our homemade laptop cooling pad:
    Step 1: Place the laptop on the cardboard
    1-place-laptop-on-cardboard
    Step 2: Draw outlines using the marker. Remove laptop and draw additional 9 cm (4+1+4) wide flaps on each side as show in the image.  Also draw a 1 cm wide gutter for folding. Click below to see full sized image.
    2-draw-the-outlines
    Step 3: Cut along the outline using paper cutter or scissors. Finally the cardboard rectangle should look like this:
    3-cut-along-outlines
    Step 4: Make folds along the lines using ruler. This is only to make it easier for us to fold the cardboard later.
    4-make-folds
    Step 5: Cut out addition 2 pieces of small rectangular cardboard each 3.5 wide and same length as the the width of cardboard rectangle we have already cut out in previous steps. These strips will increase thickness of side stands.
    5-additional-small-rectangles
    Step 6: Place one of these small rectangle on the side of larger one and make first fold. Fold over to make the 2nd fold.
    Step 7: Secure the fold with cello tape. Make sure that the fold is strong and does not open easily.
    7-stick-cello-tape
    Step 8: Repeat this for other side. These will act as two stands of the cooling pad. Apply some cello tape along the edges to improve the strength and durability.
    8-cooling-pad
    Step 9 (optional): The cooling pad is ready and can be used as it is. Optionally you can cover it with the paper of your choice to make it look better. You can make it as good looking as possible depending depending on your. With our limited skills in craft and some black paper lying around, we covered our cooling with it. Here is the completed cooling pad:

    What is the use of this of this cooling pad?

    Many of you must  be wondering that it is just a piece of cardboard. What good will it do? Here are few advantages of this cooling pad:
    • It will lower the temperature of your notebook by providing better air circulation at the bottom. Old laptops having fans at bottom will benefit more from this cooling pad.
    • If you regularly use your laptop on soft surface like bed or sofa this will lower the the temperature.
    • If your laptop has speakers at the bottom it will make the sound more audible.
    • Prevent you from heating when using the laptop on lap for extended period.

    What this cooling pad is not for?

    If your laptop is overheating to such a extent that it is too hot to touch or shuts down automatically then it is better to get it serviced or buy a cooling pad with fans.

    Testing the effectiveness

    Let us test the cooling pad we have just built and see how well it performs. We will strain the processor to maximum and record the temperature with and without the cooling pad.
    For testing we are using Prime95 for stressing the processor. It will take CPU usage to 100% which a unrealistically high load. Actual load will never reach this value. For measuring the temperature we are using HWmonitor.
    Test system:
    1. 2nd Gen Core i3 2330
    2. 4GB RAM
    3. OS: Windows 7 SP1 64-bit
    4. Age: 2 Years old and used in all sorts of conditions.
    Test Results
    NoSurfaceTemperature after 30 minutes
    With cooling padWithout
    1Hard (table)70 °C73°C
    2Soft (sofa)70 °C78°C

    Conclusion

    We can see that there was only 3 degrees drop in temperature on hard surface. But on soft surface it resulted in significant difference of 8 degrees. The laptop was overall cooler to touch and use. We were also able to use it on our lap for extended period of time without being heated ourself. So we can say that this cooling pad is better than no cooling pad but don’t expect it to work as fancy cooling pads with multiple fans available in the market. They have their own advantages (better cooling) and disadvantages (consume battery). This pad will simply lower the temperature from an uncomfortable level to a comfortable level.

    Monday 13 January 2014

    Copying Files Made Fun

    Copying Files Made Fun


    Everybody hates waiting for their computer to do things. Whenever we copy files or download something we see a green progress bar which is not interesting to look. Some people switch to other task leaving the progress bar in background while others simply stare at it/move it around hoping that it would somehow speed things up. To make that waiting time somewhat bearable there is a great application that plays music whenever you copy, move or delete files.
    The application is Instant Elevator Music. It plays music whenever you copy, move or delete files. It also works with teracopy, Vmware, 7-zip and installers. In fact, it works with anything that has a progress bar. There is also support for splash screen for Photoshop CS5 and microsoft office. Note that it has not been updated for some time so splash screen support is for limited number of applications. Though  it runs well on Windows XP, Windows 7 and Windows 8. To start with windows just check the box shown below in red.
    instant-elevator-music-settings
    There is default music but you can add your own list of songs. The songs play in sequential order. The great thing is that it resumes music from where it left the last it ran. So you don’t have to listen the beginning of a song again and again. The supported music formats are: MP3, Windows Media Audio, M4A, FLAC and Ogg Vorbis.
    instant-elevator-music
    It has some issues that it also plays music when you are watching a video on VLC or youtube. There is an option  to disable it when running iTunes, Winamp or Foobar. But there is no option for other players.

    Changing the progress bar

    There is an another application called nyan cat progress bar that changes the progress bar to animated nyan cat. There is also also nyan cat music that plays in the background. Unlike Elevator music it does not have the option to add your own songs. There also no installer so you have to extract zip file and run the exe file.
    nyan-cat-progress-bar
    These are not the kind of applications that will greatly boost your productivity. But it will definitely make your waiting time less boring. So what’s your take on this application? Please let us know in the comments.
    Powered by Blogger.


    © 2013 computer tricks. All rights resevered. Designed by Templateism

    Back To Top